Warning: You are viewing an old version of the DRS docs. To access the new APIs, see Dash Replenishment Overview.
The DRS Self-Service Portal will help you create and manage your DRS-connected devices. The device wizard simplifies the provisioning process for DRS and will guide you through creating your device model(s) and configuring your product ASIN
lists so that you can begin testing and integrating with Amazon Dash Replenishment Service.
There are three steps required in this process. You will first select the security profile you created in Step 1 and then you will move on to creating and customizing a new device.
The DRS Self-Service portal allows you to associate a single Security Profile to your DRS devices. This profile will grant your companion app(s) access to the Dash Replenishment flow using Login with Amazon. In this step you will select the profile you want to associate with DRS.
If you have previously created a device with DRS you can select a profile in the "App Settings".
Step 2. Set up the DRS-enabled device
Click on "Create a device"
Choose a device name and a model ID. The device name will be used to identify your new device in the DRS Self-Service Portal. You will later be able to define a customer-facing name in the localization screen.
The model ID will be used in the LwA registration flow.
You are now able to customize customer-facing information.
Step 3. Customize your device
Click on "My Devices", then click on the device you just created. You will be taken to the device customization page.
For any device that you create, you can customize the following properties:
Device Slots: A slot is a consumable that your device can replenish. For a printer, each slot will represent the toner or ink color, so "Slot 01" slot name could be "Black ink", "Slot 02" could be "Magenta ink" and so on. For a washing machine "Slot 01" could represent the detergent and another slot could represent the softener. Your device must be able to check the levels of each slot and re-order the associated consumables individually, when required.
Marketplace: where your device will be sold. Each marketplace will need to be localized and certified.
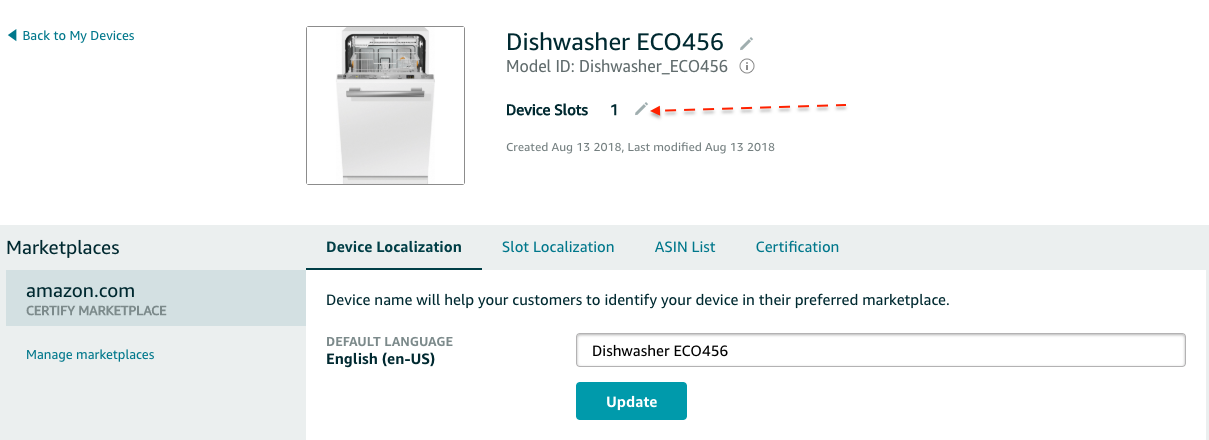
Device Localization: This device name will appear in the customer's Amazon account.
ASIN list: the list of products each slot will contain. Your Amazon point of contact will provide this.
Device image: this image will appear in the customer's Amazon account.
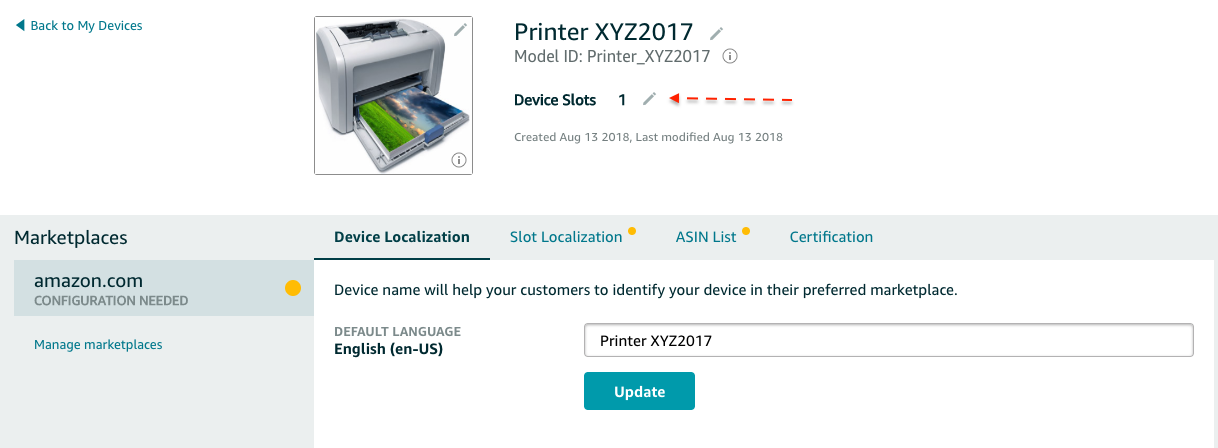
Customize a printer
In the previous step we have created a new device. By default, the device will have one slot but for a printer we will need at least 4, one for each ink color.
Note: For each slot, your device must be able to check the levels and re-order the associated consumables individually
Device image: Let's start by uploading an image of our printer. Please choose a BMP, JPG, PNG or GIF image with a maximum size of 1MB and a white or transparent background.
Device slots: We can now add all the required slots. Click on the pencil icon next to "Device Slots".
Slot name: Customize each slot with an ID that you will be using later. In our example, we will use the slot color as our ID
Press Save to continue.
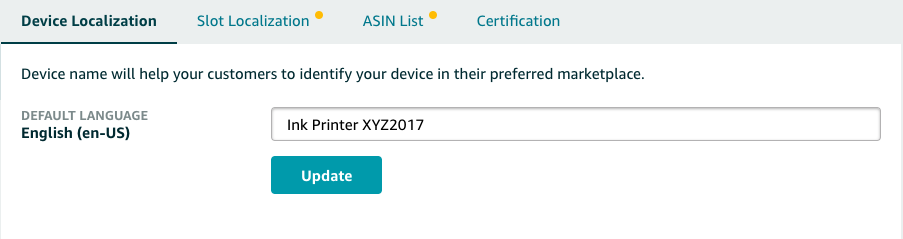
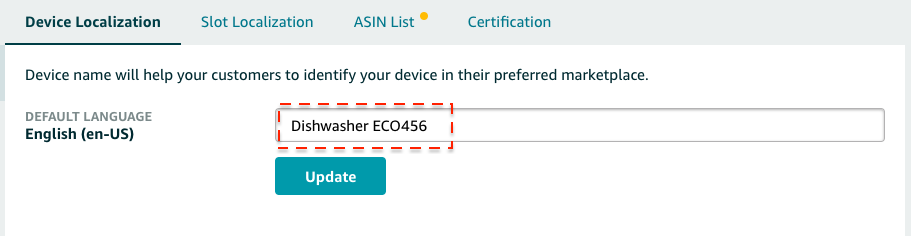
Device name localization: You should now change the customer-facing name for your device. By default, it will have the same name as the one you chose for developer portal but it can be different. This name will appear in the customer's Amazon account.
You will have to repeat this step in each marketplace you decide to sell your device in.
Slot localization: The slot name is also customer-facing. Click on Slot localization and update its name.
You will have to repeat this step for each slot, in each marketplace. Once defined, the name will be displayed to the customer in the production selection page, like the following:
ASIN List: This tab will allow you to modify the consumables your product offers to customers. By default, the DRS Self-Service Portal adds a placeholder ASIN (batteries) that you can use during the testing phase. Your Amazon Point of Contact will provide the list of ASINs to add to that tab.
Marketplaces: if you are planning to launch your product in additional marketplaces, you can add more by clicking on Manage marketplaces. You will have to repeat steps 4 through 6 for any additional marketplace.
Certification: When you are ready to certify, you may click on the "Certification" tab to start the process. Please liaise with your Amazon Point of Contact to begin this process.
Customize a washing machine
In the previous step we have created a new device. By default, the device will have one slot but for a washing machine we will need at least 2, one for detergent and one for the softener. Depending on your device functionality you may have additional slots (e.g. bleach).
Note: For each slot, your device must be able to check the levels and re-order the associated consumables individually
Device image: Let's start by uploading an image of our washing machine. Please choose a BMP, JPG, PNG or GIF image with a maximum size of 1MB and a white or transparent background.
Device slots: We can now add all the required slots. Click on the pencil icon next to "Device Slots".
Slot name: Customize each slot with an ID that you will be using later. In our example, we will use the detergent type as our ID.
Press Save to continue.
Device name localization: You should now change the customer-facing name for your device. By default, it will have the same name as the one you chose for developer portal but it can be different. This name will appear in the customer's Amazon account.
You will have to repeat this step in each marketplace you decide to sell your device in.
Slot localization: The slot name is also customer-facing. Click on Slot localization and update its name.
You will have to repeat this step for each slot, in each marketplace. Once defined, the name will be displayed to the customer in the production selection page, like the following:
ASIN List: This tab will allow you to modify the consumables your product offers to customers. By default, the DRS Self-Service Portal adds a placeholder ASIN (batteries) that you can use during the testing phase. Your Amazon Point of Contact will provide the list of ASINs to add to that tab.
Marketplaces: if you are planning to launch your product in additional marketplaces, you can add more by clicking on Manage marketplaces. You will have to repeat steps 4 through 6 for any additional marketplace.
Certification: When you are ready to certify, you may click on the "Certification" tab to start the process. Please liaise with your Amazon Point of Contact to begin this process.
Customize a dishwasher
In the previous step we have created a new device. By default, the device will have one slot and for a dishwasher this can be used for the tablets. Depending on your device functionality you may have additional slots (e.g. cleaner, salt).
Note: For each slot, your device must be able to check the levels and re-order the associated consumables individually
Device image: Let's start by uploading an image of our dishwasher. Please choose a BMP, JPG, PNG or GIF image with a maximum size of 1MB and a white or transparent background.
Device slots: We can now modify the slot if you wish. Click on the pencil icon next to "Device Slots".
You may jump to step 4 if don't need to customize slots.
Slot name: Customize each slot with an ID that you will be using later. In our example, we will use the consumable type as our ID.
Press Save to continue.
Device name localization: You should now change the customer-facing name for your device. By default, it will have the same name as the one you chose for developer portal but it can be different. This name will appear in the customer's Amazon account.
You will have to repeat this step in each marketplace you decide to sell your device in.
Slot localization: The slot name is also customer-facing. Click on Slot localization and update its name.
You will have to repeat this step for each slot, in each marketplace. Once defined, the name will be displayed to the customer in the production selection page, like the following:
ASIN List: This tab will allow you to modify the consumables your product offers to customers. By default, the DRS Self-Service Portal adds a placeholder ASIN (batteries) that you can use during the testing phase. Your Amazon Point of Contact will provide the list of ASINs to add to that tab.
Marketplaces: if you are planning to launch your product in additional marketplaces, you can add more by clicking on Manage marketplaces. You will have to repeat steps 4 through 6 for any additional marketplace.
Certification: When you are ready to certify, you may click on the "Certification" tab to start the process. Please liaise with your Amazon Point of Contact to begin this process.
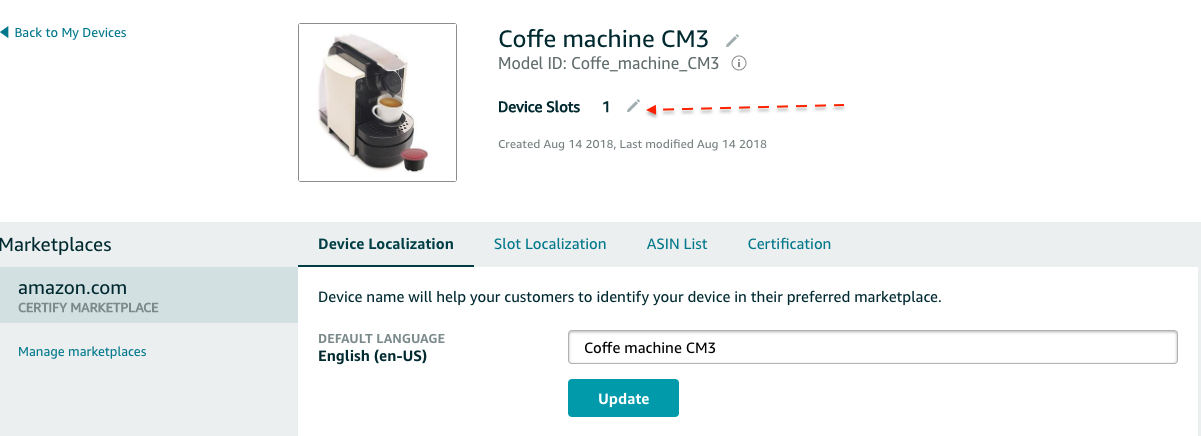
Customize a coffee machine
In the previous step we have created a new device. By default, the device will have one slot and for a coffee machine this can be used for pods. Depending on your device functionality you may have additional slots (e.g. filter coffee, pods).
Note: For each slot, your device must be able to check the levels and re-order the associated consumables individually
Device image: Let's start by uploading an image of our coffee machine. Please choose a BMP, JPG, PNG or GIF image with a maximum size of 1MB and a white or transparent background.
Device slots: Device slots: We can now modify the slot if you wish. Click on the pencil icon next to "Device Slots".
You may jump to step 4 if don't need to customize slots.
Slot name: Customize each slot with an ID that you will be using later. In our example, we will use the consumable type as our ID.
Press Save to continue.
Device name localization: You should now change the customer-facing name for your device. By default, it will have the same name as the one you chose for developer portal but it can be different. This name will appear in the customer's Amazon account.
You will have to repeat this step in each marketplace you decide to sell your device in.
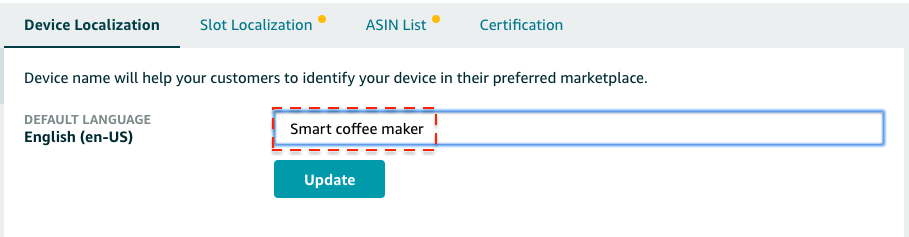
Slot localization: The slot name is also customer-facing. Click on Slot localization and update its name.
You will have to repeat this step for each slot, in each marketplace. Once defined, the name will be displayed to the customer in the production selection page, like the following:
ASIN List: This tab will allow you to modify the consumables your product offers to customers. By default, the DRS Self-Service Portal adds a placeholder ASIN (batteries) that you can use during the testing phase. Your Amazon Point of Contact will provide the list of ASINs to add to that tab.
Marketplaces: if you are planning to launch your product in additional marketplaces, you can add more by clicking on Manage marketplaces. You will have to repeat steps 4 through 6 for any additional marketplace.
Certification: When you are ready to certify, you may click on the "Certification" tab to start the process. Please liaise with your Amazon Point of Contact to begin this process.
Editing device details
You are able to modify all localization information as described in the above steps.
Before you submit for certification you can:
Edit the device name for each marketplace.
Edit the slot name for each marketplace.
Edit the device image for each marketplace.
Add or remove slots.
After you submit for certification you can:
Add new marketplaces.
For any of the following you will need to get in touch with your Amazon point of contact:
Deleting marketplaces.
Deleting a modelId from the developer portal
Change any of the device details
Next Step
Next, we will look at integrating Login with Amazon in your companion apps. This is required to access the product selection and authenticate with the DRS API endpoints.