
Build Your App
This page walks you through building an app with the Vega SDK. The SDK includes multiple templates and two build approaches: Vega Studio and Vega CLI. Vega Studio is a VS Code extension that provides commands through the command palette, while Vega CLI offers terminal-based commands.
If you're new to building apps with Vega, see Build a Hello World app.
All build options
Vega offers multiple pathways for you to create your customs app based on your specific requirements. You can choose from the following build approaches:
Build an app with Vega Studio
Vega Studio is an extension in VS Code that lets you create, build, run, test, debug, and analyze app performance on Fire TV and other Vega-supported platforms. This section provides steps to build Vega apps with Vega Studio.
Prerequisites
Step 1: Create a Vega project
-
Open Visual Studio Code (VS Code).
-
Select the Vega extension icon
 from the activity bar to open the Kepler Studio panel.
 -
Click the + (Create Vega Project) icon from the Projects section.
-
Choose a project template.
- hello-world - Use this project template to create an app that depends on React Native v0.72.
- basic-turbo-module - Use this project template to create a custom Turbo Module.
- idl-turbo-module - Use this project template to create an app compatible with all supported React Native versions and native IDL APIs.
Note: You can also display the project templates using the command palette. For Mac, press ⌘ + shift + p. For Linux, press Ctrl + shift + p then enter Kepler Project: Create a new Kepler project. - Select a directory for your project.
-
Provide a project name for your app (no spaces or special characters).
For example: My3PSample
Press
Enterafter entering your project name. -
Enter a package name for your project in this format
<top-level domain>.<company_name>.<app_name>.For example: com.org.vegaproject
Press
Enterafter entering a package name for your project.Vega Studio creates your project based on your selected template. When you select a
basic-turbo-moduleoridl-turbo-moduletemplate with an open project, Vega Studio creates a multi-root workspace. The new project appears as a folder, so you can use the Turbo Module as a dependency and develop both in the same VS Code window. Vega Studio adds the newbasic-turbo-moduleas a dependency to your open project. If you have multiple Vega apps open duringbasic-turbo-modulecreation, the extension prompts you to select the target app.
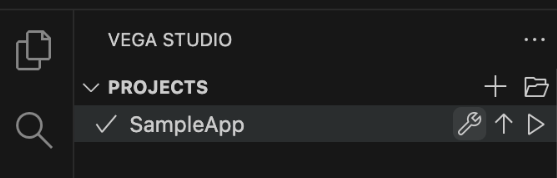
Step 2: Build a Vega app
-
Select your project from Kepler > Projects.

-
Choose your build mode (debug or release) from the Build Mode section.

-
Select the play button
 from the Devices section to start the target virtual device.
 -
Select the build button
 next to your project name to start the build process.

View the build output
- Go to the integrated terminal panel in VS Code.
- Select the Output tab.
-
Choose Kepler from the drop-down list.
You should see info build-kepler completed. If the build fails, identify the issue by expanding the error messages.
Step 3: (Optional) Configure a custom port
You can specify a custom port other than port 8081.
- Go to Code > Settings > Settings in VS Code.
- Enter React Native Port in the search box.
- Enter your port number.
-
Reload VS Code when prompted.
When you start a debug session, Vega Studio automatically configures shared preferences on the device in
/data/shared_preferences.json.
Step 4: Run and test a Vega app
On Vega Virtual Device
-
Navigate to Kepler Studio > Devices and select
VirtualDevice:Tv. -
Select the play button to start the virtual device.
-
Wait for the VVD window to open and the device to finish loading (VirtualDevice:Tv status should be ready, not 'Loading…')
-
Select the play button next to your project name.
For details, see Vega Virtual Device.
On Fire TV Stick:
- Select your Fire TV Stick device from Kepler Studio > Devices.
-
Click the "play" button next to your project name.
For details, see Fire TV Stick.
Step 5: (Optional) Stop the React Native Packager
There are two options to stop the React Native Packager:
Option 1: Through the VS Code status bar

Click the React Native Packager button in the VS Code status bar at the bottom. When you hover it, you see the tooltip Stop Packager.
Option 2: Through the VS Code Command Palette

-
Open Command Palette:
Mac: Cmd+shift+P Linux: Ctrl+Shift+P
-
Enter and select React Native: Stop Packager.
After stopping the Packager (using either option), restart your app from Kepler Studio > Projects. Select the play button to the right of your app name.
Step 6: Debug a Vega app
The Vega Studio provides a built-in debugger. To use it, follow the instructions in Debug with Vega Studio.
Step 7: Analyze app performance
Vega Studio provides tools to help you analyze and optimize your app's performance. For details, visit the following pages:
Build an app using the Vega CLI
The Vega command-line interface (CLI) provides pre-built project templates with core functionalities to accelerate your development. Each project template contains all necessary files and configurations required to run your app on Vega devices, including manifest files, native modules, and the proper directory structure.
Prerequisites
Project templates
To see the list of available project templates:
kepler project list-templates
After you run kepler project list-templates, you see the following project templates:
- hello-world - Use this project template to create an app that depends on React Native v0.72.
- basic-turbo-module - Use this project template to create a custom Turbo Module.
- idl-turbo-module - Use this project template to create an app compatible with all supported React Native versions and native IDL APIs.
Step 1: Generate a project
-
Use the
kepler project generatecommand to create an app.The command takes four arguments:
--template- The Vega project template (for example: hello-world).--name- Your app name (no spaces or special characters).--packageId- Your app's unique identifier
Important: Your packageId should be in this format:<top-level domain>.<company_name>.<app_name>. Don't usecom.amazon.--outputDir(optional) - Your project location. If you don't specify a project location, the system creates your project location in your current working directory.
Example command:
The following example command creates a new app named
keplersampleapp. The command outputs the path to your project location.kepler project generate --template hello-world --name keplersampleapp --packageId com.amazondeveloper.keplersampleapp --outputDir keplersampleapp -
Navigate to your new app:
cd keplersampleappImportant: By default, yourpackageIdin the manifest file iscom.amazondeveloper.appname. When you create an app, replace thepackage Idwith a reverse DNS representation of your domain name. Don't usecom.amazon.
Step 2: Build your app
Install the dependencies and build:
npm install
npm run build:app
The commands install necessary NPM dependencies, build the native code, then bundle the JavaScript using the Metro bundler.
The build creates a build folder with your app's package vpkg:
├── hellovega
│   ├── build
│   │   ├── x86_64-release
│   │   |   ├──hellovega_x86_64.vpkg #use the path to this file to run your app on the virtual device for x86 machines
│   │   ├── armv7-release
│   │   |   ├──hellovega_armv7.vpkg #use the path to this file to run your app on the Fire TV Stick
│   │   ├── aarch64-release
│   │   |   ├──hellovega_aarch64.vpkg #use the path to this file to run your app on the virtual device for M-series machines
VPKG file location
The build generates VPKG files in the following locations:
General path structure:
<project-root>/build/<cpu-architecture>-<build-type>/<project-name>_<cpu-architecture>.vpkg
Development build:
<project-root>/build/<cpu-architecture>-debug/<project-name>_<cpu-architecture>.vpkg
Release build:
<project-root>/build/<cpu-architecture>-release/<project-name>_<cpu-architecture>.vpkg
Example:
- Project name: hellovega
- VPKG location: ~/workspaces
- Release VPKG location (to upload for app submission):
~/workspaces/hellovega/build/armv7-release/hellovega_armv7.vpkg
Metro, a React Native’s JavaScript bundler, starts at the command prompt window. Metro takes in an entry file and returns a single JavaScript file with all of your code and dependencies.
Step 3: Set up Fast Refresh
Fast Refresh is a React Native function that lets you see changes in your app without rebuilding. Unlike Vega Studio which enables Fast Refresh automatically, Vega CLI requires manual setup.
For complete setup instructions, see Set Up Fast Refresh with Vega CLI.
Step 4: Run your app on Vega Virtual Device
The Vega SDK includes the Vega Virtual Device, which lets you run and test your apps without needing a physical device.
See Run your app on Vega Virtual Device for complete instructions.
Related topics
- Fix Vega Studio Build Issues
- Run your app on Vega Virtual Device or Fire TV Stick
- Set Up Fast Refresh to Build Apps Using Vega CLI
- Resolve Vega Extension Issues
Last updated: Oct 31, 2025